Often times, SharePoint lists contain address data. We are all familiar with finding places based on addresses, so it seems obvious to most of us that addresses correspond to particular locations on the Earth's surface. Yet maps represent geographic space - locations on the Earth's surface - using coordinate systems. This means that, for an address to be plotted on a map, the address must first be converted to a coordinate that corresponds to a location in a coordinate system. The process of finding the coordinate location of an address is called geocoding. So before a list of addresses can be drawn on a map, those addresses must first be geocoded.
ArcGIS Mapping for SharePoint provides the ArcGIS Geocoding Workflow to find the geographic coordinates of addresses stored in SharePoint lists. Surfacing this functionality as a SharePoint workflow provides an experience that is easy to use and familiar to many SharePoint users.
When the workflow is executed on a list that contains address data, it will add three new columns to the list:
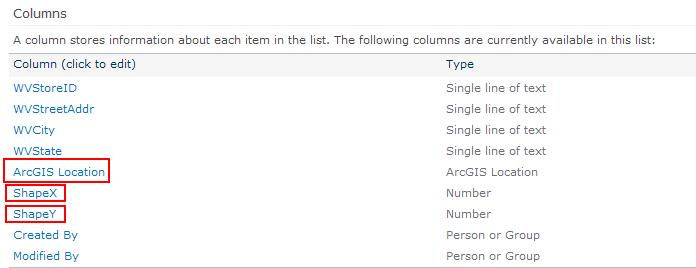
| ShapeX and ShapeY won't be created if the user chooses to use preexisting fields - but the values in these selected fields will be overwritten with the X and Y coordinates. |
The ShapeX and ShapeY fields store the geographic coordinate for the list item. The ArcGIS Location field embeds an interactive map in each item's form, which allows users to easily view and manipulate an item's location.
Add the ArcGIS Geocoding Workflow to a list
-
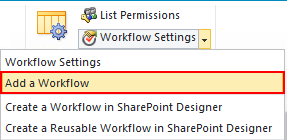
Navigate to the list that contains the address data. Then, from the list tab, select Add a Workflow from the Workflow Settings drop-down menu:
-
On the following page, select ArcGIS Geocoding as the workflow template and give the workflow a name. Optionally, you can configure the task list, history list, and start options. Then click Next:
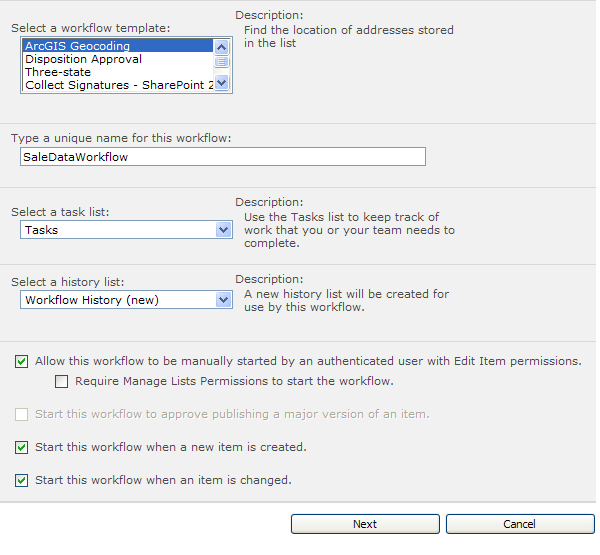

The two checkboxes at the end of the page, Start this workflow when a new item is created and Start this workflow when an item is changed allow you to have the locations of items automatically updated when changes are made to existing items or new items are added to the list. -
Once you click Next, a wizard will load for you to configure the geocoding operation. The Locator page will be shown first. On this page, select the service you would like to use to perform the geocoding operation and click Next:


You can configure the available locator services by editing the ArcGIS Mapping Locators list. See Configuring Locators for more information. -
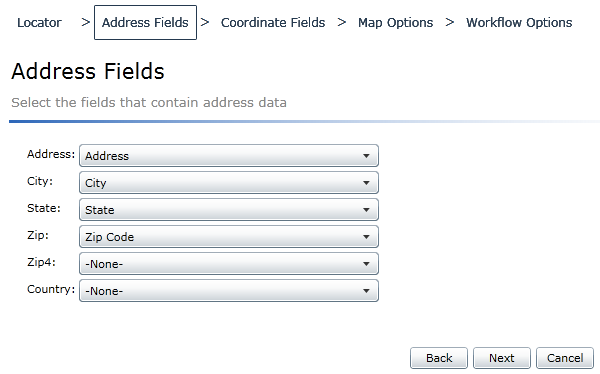
On the next page, select the columns in the SharePoint list that correspond to the input parameters of the selected locator service. When you are done with this step, click Next:
-
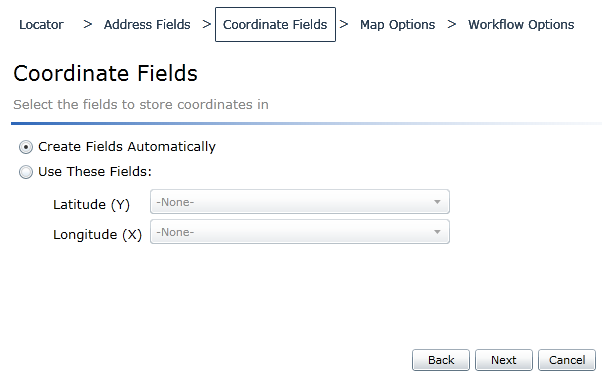
As explained above, the ArcGIS Geocoding Workflow will determine geographic coordinates for each item in the SharePoint list. On the Coordinate Fields page, you can specify the columns to store the coordinates in. If you choose to have the workflow create the fields automatically, it will store the longitude in a field called ShapeX and the latitude in a field called ShapeY. If specify existing columns for the output, be aware that the values in these columns will be overwritten by the workflow with the latitude and longitude coordinates:
-
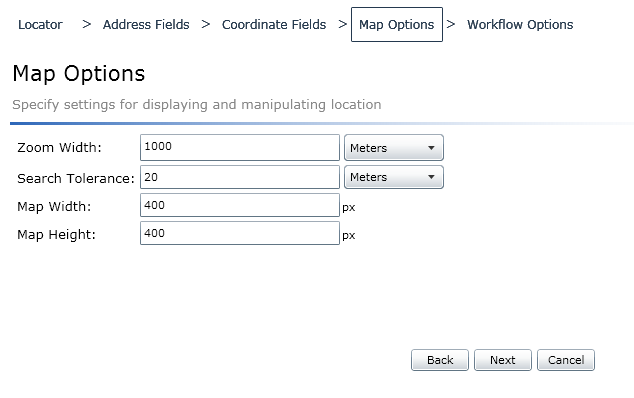
The ArcGIS Location Field displays the location of the list item on an interactive map within the item's display and edit forms. On the Map Options page, you can specify the Zoom Width and the Search Tolerance for the location field. The Zoom Width determines the width of the extent shown in the location field. The Search Tolerance specifies the radius to use for address lookup when you use the location field's Fix button. Map Width and Map Height determine the width and height of the map that appears in the display and edit forms:
-
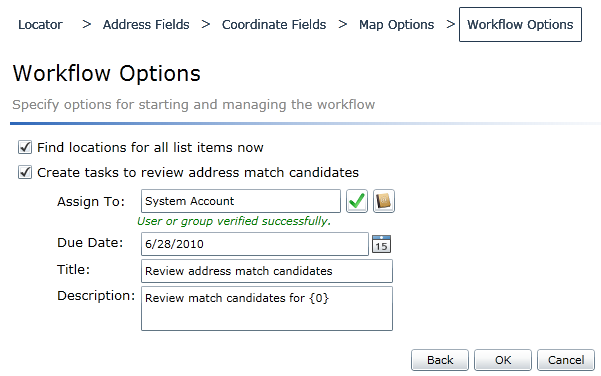
On the last page of the wizard, you can specify options for starting and managing the workflow. If the Find locations for all list items now checkbox is checked, the entire list will be geocoded immediately. If it is not checked, each item can be geocoded individually. For instructions on how to accomplish this, refer to the topic Geocoding a list item.
Checking the Create tasks to review address match candidates checkbox will create a task for each item in the list. Tasks are created for items that return more than one address candidate. This task requires the user to edit the item and select one of the candidates from the list. For information on this process, see Selecting an address match candidate.
OK button to create the workflow:
No Match Candidates
Occasionally, the locator will return no candidates for an address. No tasks will be created for the item as is the case when only one candidate is found. It is a good idea to check your list items to make sure that each item has a valid location.
Whenever an address has no candidates, this is obvious after opening the edit dialog. The Select button on the ribbon is not available and no coordinates are displayed in the coordinate fields:
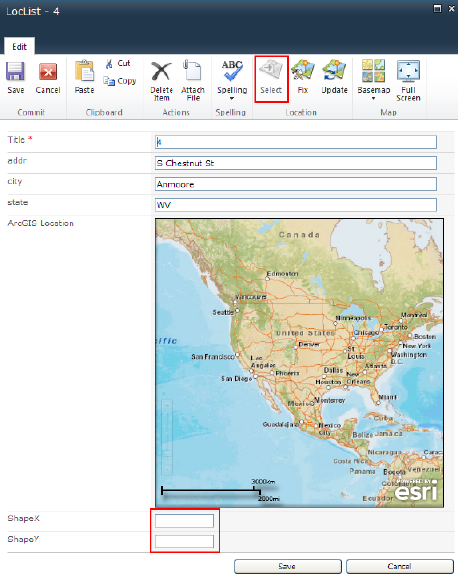
If you have a new address available for this location, you can correct this problem immediately:
-
Enter the new address in the address fields.
-
Click Update:

-
Click Save:

Preparing SharePoint data for mapping
About preparing SharePoint data


