


Clustering can be applied to point layers of types that allow configuration of symbology. This includes layers from ArcGIS Server Dynamic Map Services, tables from Spatial Data Service endpoints, and SharePoint lists. For more information on the different layer types and their capabilities, refer to the Layer Types topic.
About clustering
When a layer contains a large number of point features, showing each feature individually on the map is often not useful. In this scenario, point features often overlap, making it difficult to distinguish between features. Even when they do not overlap, it is usually difficult or impossible to visually extract meaningful information when hundreds or thousands of points are shown all at once.
One approach to resolving this issue, known as clustering, is to aggregate groups of point features into one symbol. Within the ArcGIS Map Web Part, clustering will aggregate the points in a layer that are within a certain distance of one another on the screen. Since the clustering is dependent on screen distance, more points are aggregated into fewer groups as you zoom out. Conversely, points are divided into more and more groups as you zoom in. When you zoom in to a level where the clustering area around one point feature no longer contains any other features, that feature will not be clustered, but rather will be shown in its location with the symbology specified by the layer's renderer.
Configuring clusetering
-
Select the desired point layer in the Map Contents panel. For instructions, see The Map Contents Panel.
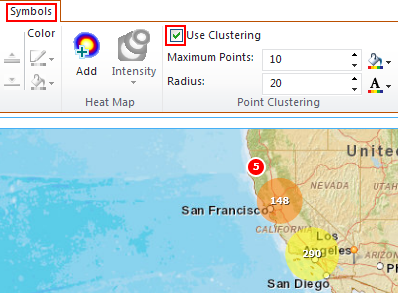
-
Check the Use Clustering checkbox to apply clustering to the selected layer. The configuration controls in the Point Clustering group will also be enabled:
-
Use the Maximum Points up and down buttons to select a number for the maximum number of points in a cluster or click the text box and enter the number manually:

This number determines the maximum number of points that can be included in an interactive cluster. Interactive clusters flare out when you move the mouse over them, displaying one flare for each feature within the cluster. You can then hover over each flare to view the associated feature's pop-up:
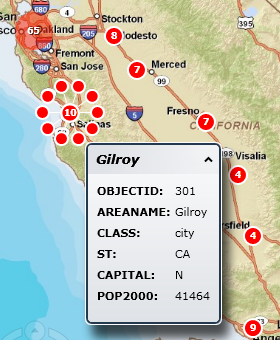
Clusters that contain more features than the number specified here, such as the one with 65 features in the upper left corner of the image above, are not interactive.
-
Use the Radius up and down buttons to select the distance (in screen pixels) for the cluster, or click the text box and enter the number manually. Features that are within this distance of one another will be aggregated into a cluster:

-
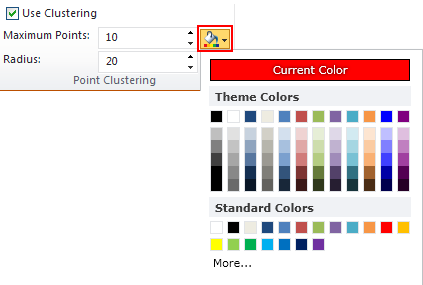
Use the Cluster Fill Color button to select the fill color of the cluster symbol:
-
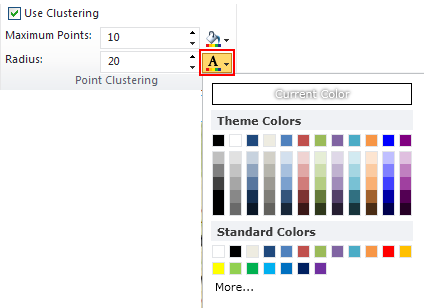
Use the Cluster Fore Color button to specify the text and border color of the cluster symbol:
For more detailed information on setting colors, refer to the Changing symbol color section in the Single Symbol Rendering topic.