NOTE: The routing services are available only on the ArcGIS Data Appliance with routing option.
Adding a service to an ArcGIS Explorer map
Example: Draping an ArcGIS Data Appliance service over your own elevation data in ArcGIS Explorer
ArcGIS Explorer is a free, downloadable GIS viewer that gives you an easy way to explore, visualize, and share GIS information. This page explains how to add ArcGIS Data Appliance services to an ArcGIS Explorer map, then gives an example of how you might combine your own data with an ArcGIS Data Appliance service in an ArcGIS Explorer map. It also includes a section on using the locators included on the ArcGIS Data Appliance with your maps.
NOTE: If you are using ArcGIS Explorer in an environment without an internet connection, see Use ArcGIS Explorer behind a firewall in the Application Configurations book in ArcGIS Explorer Help.
NOTE: The availability of some basemaps and services mentioned in this document may vary depending on the package of the ArcGIS Data Appliance that you purchased.
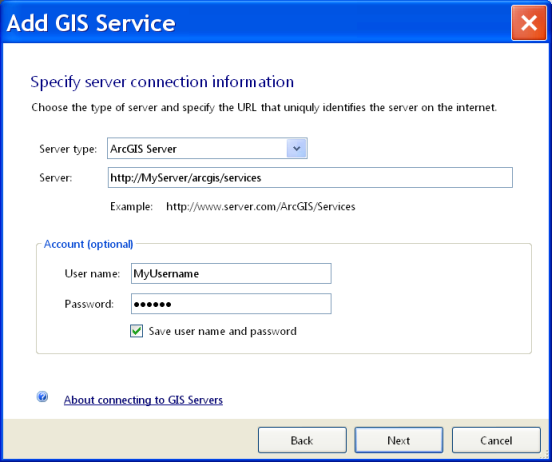
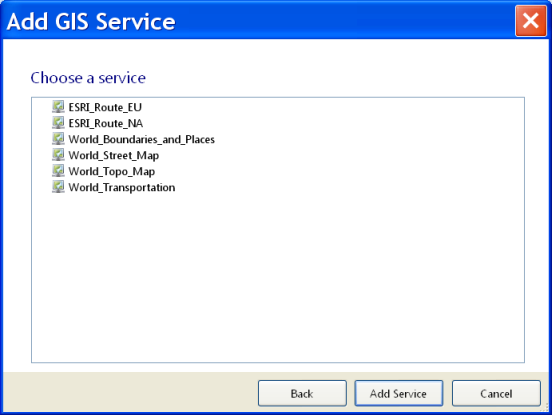
To add a service from the ArcGIS Server Data Appliance into ArcGIS Explorer, follow these steps:
NOTE: The routing services are available only on the ArcGIS Data Appliance with routing option.
ArcGIS Explorer allows you to tilt the globe to view terrain in 3D. By default, ArcGIS Explorer accesses a set of elevation datasets hosted by ESRI. At best, the resolution of these datasets is 30m. If you have higher-resolution elevation data, you can configure ArcGIS Explorer to use your data instead.
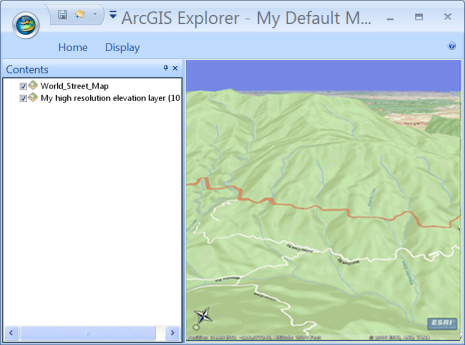
Draping an ArcGIS Data Appliance service over high-resolution elevation data creates a powerful basemap for 3D exploration and analysis. The image below shows the World Street Map from the ArcGIS Data Appliance draped over a high-resolution elevation dataset.
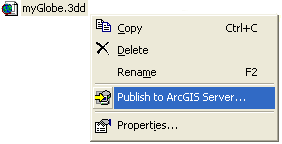
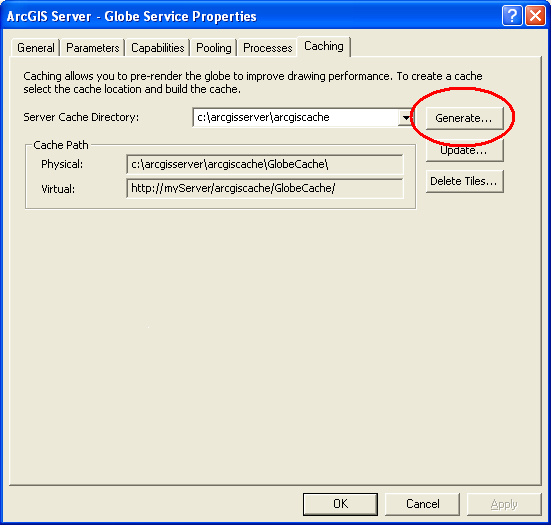
To create an ArcGIS Explorer map with your own elevation data, you need to use ArcGIS Server to publish a globe service that contains the elevation layer. You can then load the globe service into ArcGIS Explorer. An advantage of using a globe service is that users who open the map will not need to have access to your local data.
The following steps explain the workflow of creating the globe service and adding it to an ArcGIS Explorer map. If any of these steps seem unfamiliar to you, see the Globe Services topic under Publishing Services > Types of Services in the ArcGIS Server Help.
After adding your elevation dataset, you can select a service from the ArcGIS Data Appliance to overlay your elevation dataset. Optionally, you can add other data from your own servers and share the ArcGIS Explorer map (.nmf) with others.
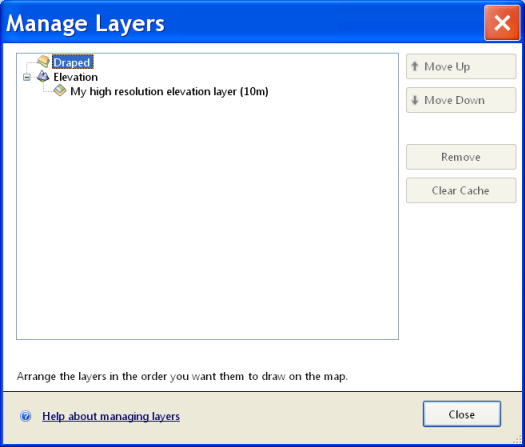
When you add the service, ArcGIS Explorer automatically recognizes that it contains an elevation layer. On the Home tab in the Map group, you can click Manage Layers to see it included in the list of elevation layers. If there are any other elevation layers in the map, ArcGIS Explorer will choose the highest-resolution dataset that is appropriate for the area you are viewing.
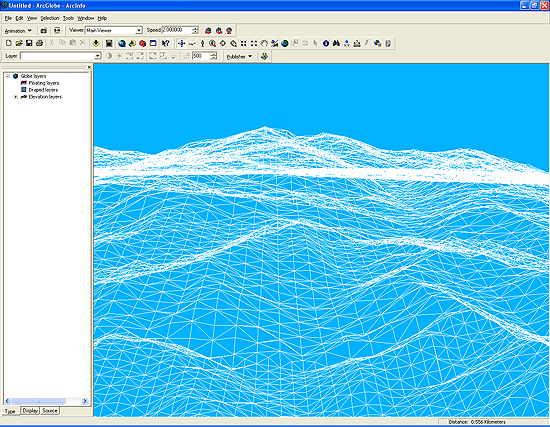
At this point, you will still only see a wireframe. Now you'll add a service from the ArcGIS Data Appliance to provide the basemap.
There are two steps involved in using the locators included on the ArcGIS Data Appliance: Specifying custom services for finding addresses, and finding an address.
NOTE: If you are using ArcGIS Explorer in an environment without an internet connection, see Use ArcGIS Explorer behind a firewall in the Application Configurations book in ArcGIS Explorer Help.
NOTE: The availability of some locators mentioned in this documentation may vary depending on the ArcGIS Data Appliance package that you purchased.
By default, ArcGIS Explorer starts up with the default application configuration that includes all the built-in functionality and content from ESRI. To use the locators included on the ArcGIS Data Appliance instead of the default locators, you need to create an application configuration.
To create an application configuration with a custom resource:
 , then click Set Application Configuration.
 When you specify custom services, ArcGIS Explorer’s Find, Find Directions, and Find Route windows will use the services you’ve specified instead of the ArcGIS Online-hosted services.
To learn more about setting custom resources, see Custom Resources in the Application Configurations book in ArcGIS Explorer Help.
Now that your ArcGIS Explorer configuration is set up to use an ArcGIS Data Appliance address locator, you can start using it.
To find an address in ArcGIS Explorer:
 .
. . The European Address Locator supports multiple levels of geocoding, including street address, street name, city, and postal code. The North American Address Locator supports the following levels of geocoding in the USA: street address point, street address, ZIP Code, ZIP+4, and city/state. The following levels of geocoding are supported in Canada: street address, street name, postal code, and city/province.
For details on Find results, see the technical notes for the European Address Locator or North American Address Locator.
For more information on using the Find tool, see Find Places, Addresses or Locations in the Finding book in ArcGIS Explorer Help.
There are two steps involved in using the routing services included on the ArcGIS Data Appliance: Specifying custom services for finding directions, and finding directions.
NOTE: If you are using ArcGIS Explorer in an environment without an internet connection, see Use ArcGIS Explorer behind a firewall in the Application Configurations book in ArcGIS Explorer Help.
NOTE: The availability of some services mentioned in this documentation may vary depending on the ArcGIS Data Appliance package that you purchased.
By default, ArcGIS Explorer starts up with the default application configuration that includes all the built-in functionality and content from ESRI. To use the locators included on the ArcGIS Data Appliance instead of the default locators, you need to create an application configuration.
To create an application configuration with a custom resource:
, then click Set Application Configuration. When you specify custom services, ArcGIS Explorer’s Find, Find Directions, and Find Route windows will use the services you’ve specified instead of the ArcGIS Online-hosted services.
To learn more about setting custom resources, see Custom Resources in the Application Configurations book in ArcGIS Explorer Help.
Now that your ArcGIS Explorer configuration is set up to use an ArcGIS Data Appliance routing service, you can start using it.
To find directions or a route in ArcGIS Explorer, use the Directions  or Route
  tool.
tool.
For information on using these tools, see Find Directions or Find Route in the Finding book in ArcGIS Explorer Help
For details on Find Directions or Find Route results for an ArcGIS Data Appliance routing service, see the technical notes for the European Routing or North American Routing service.