As part of creating an ArcGIS.com web map using the ArcGIS Map Web Part, you specify who will have access to your map. One option is to share your map with members of one or more ArcGIS.com groups. The web part gives you the ability to create and manage your own ArcGIS.com groups.
To work with ArcGIS.com groups, you need to open and sign into the Map Center. For instructions, see Signing in to ArcGIS.com.
Creating groups
-
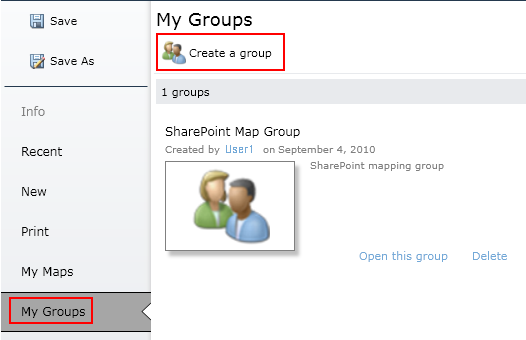
Click the My Groups tab. On the page that appears, click the Create a group button:
-
A dialog will open to specify information about the group. Enter the title to enable the Create button. Optionally, you can specify tags, type a summary, or change the thumbnail. At the bottom of the dialog, you can set the availability of this group to ArcGIS.com members:
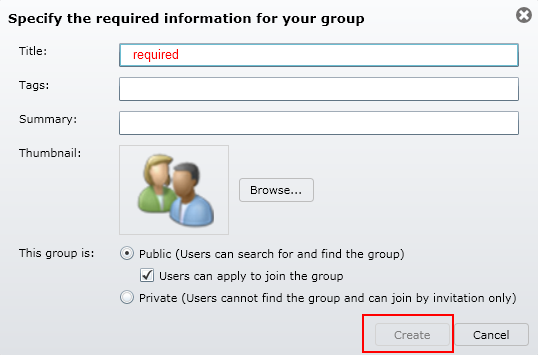
The options for group visibility are as follows:
- Public - gives all ArcGIS.com members the ability to view your group.
- Users can apply... - if checked, ArcGIS.com members will be able to request membership in the group. Otherwise, membership in the group is by invitation only
- Private - the group will only be visible to group members. Membership is by invitation only.
Managing groups
-
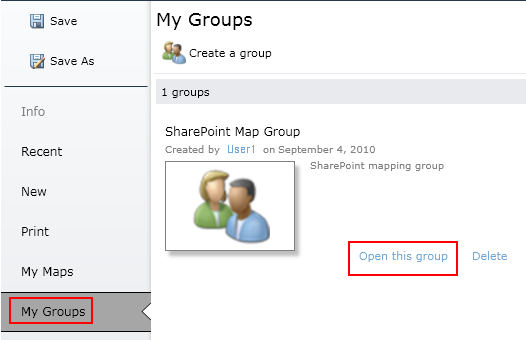
Click the My Groups tab to open the My Groups page. Locate the group you wish to manage and click Open this group:
-
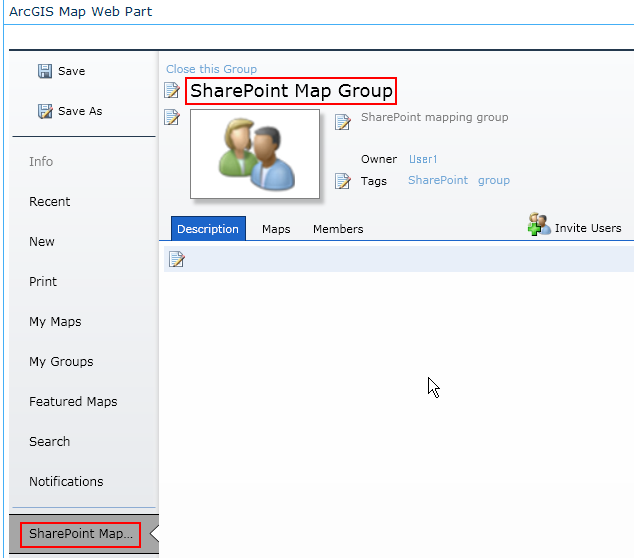
A tab for the group will appear along the left side of the Map Center and a page will open for managing the group:
-
Edit the title, summary, tags and thumbnail in the upper section of the page by clicking the edit buttons for each. Click on the Commit buttons to save changes:

-
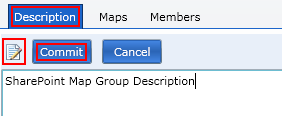
To edit the group's description, click the Description tab. Then, click the edit button to make the description editable. Type the description and click Commit:
-
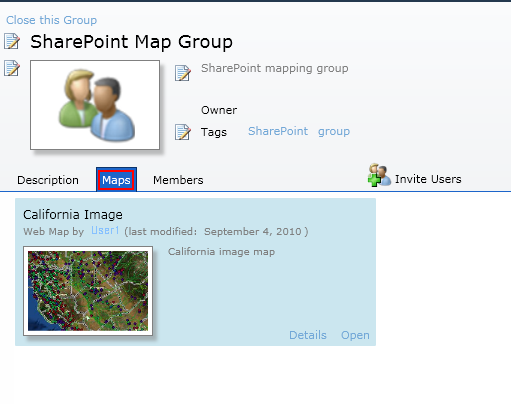
Click the Maps tab to view the maps available to the group:
-
To manage group membership and visibility, click the Members tab. To change the group's availability to other ArcGIS.com members, click the edit button, then select options as desired:
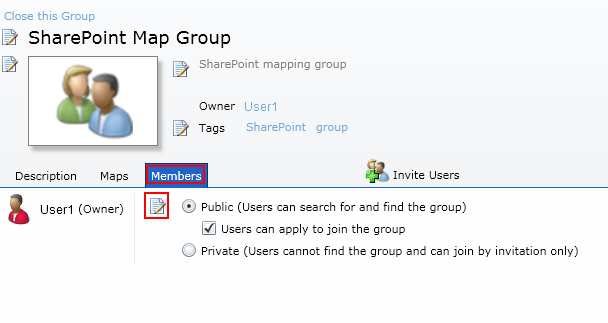
For an explanation of the group visibility options, refer to the Creating a group section, above.
-
Click
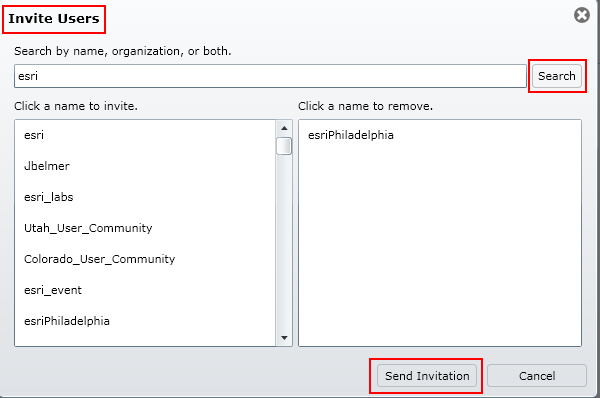
 to open the Invite Users dialog:
- To invite users:
-
Enter the name or organization you are searching for and click Search to populate the bottom left panel with ArcGIS.com members retrieved from your search.
-
Click on a member name in the left bottom panel to add that member to the invitation list in the bottom right panel.
-
To remove a member from the invitation list click on the member's name in the bottom right panel.
-
Once all members you wish to invite have been added to the invitation list, click Send Invitation. They will then have is invitation available to them to accept or decline their ArcGIS.com Notifications.
-
-
If you have made the group Public and allowed ArcGIS.com members to apply for membership in this group, you can manage these requests by selecting the Map Center's Notifications tab:


