Add ArcGIS® Mapping Web Parts
Once ArcGIS Mapping for SharePoint has been deployed and activated on a SharePoint site collection, you can add the Map and Geolist Web Parts to a page. To do so, you must be logged into SharePoint with an account that has permissions to edit the page.
To add the Web Parts, do the following:
- Navigate to the page to which you want to add the web part.
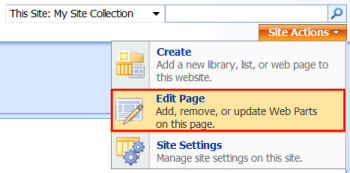
- Click on Site Actions --> Edit Page. Note that the Site Actions menu may appear differently depending on what features you have enabled.
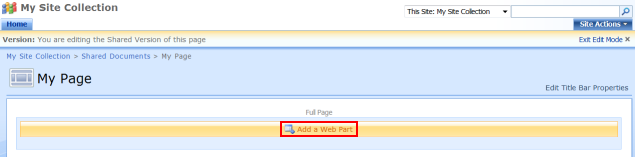
- Click on the button labeled "Add a Web Part" in the section of the page where you would like to add the web part. Note that, for this button to appear, you must be editing a document that supports web parts.
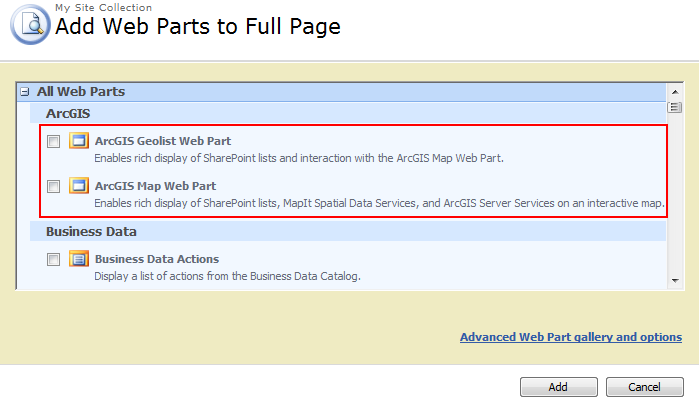
- The Add Web Parts dialog will be displayed. Scroll to the ArcGIS section and check the boxes next for the ArcGIS Geolist Web Part and ArcGIS Map Web Part. Then click the Add button.
Note: if the Map and Geolist Web Parts are not available, ArcGIS Mapping may need to be deployed to the web application and/or activated on the site collection. See the
Activate topic for further information.
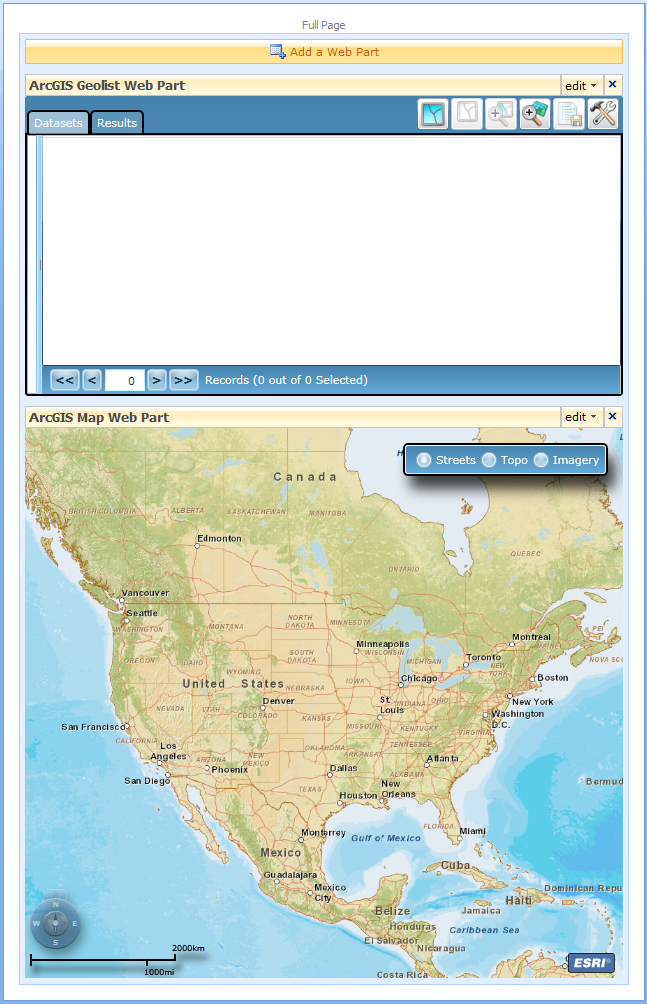
- The Map and Geolist Web Parts will be added and displayed within the page. The bounds of the web parts are defined by the web part zone that contains them. By default, the ArcGIS Online Street Map map service is displayed as the base map and the initial extent includes the central portion of North America. A set of radio buttons is shown in the upper right-hand corner that allows you to toggle the base map between the street map and topographic and imagery services proved by ArcGIS Online. Since no SharePoint lists have been added to the map, the Geolist initially does not contain any data.
The web parts are now ready to be configured - see the Edit Web Parts topic to get started.