
You must have a Web server and Servlet Engine installed and operational before you can configure them for ArcIMS. For information on setting up your Web server and Servlet Engine visit http://support.esri.com/search/KbDocument.asp?dbid=31218.
IMPORTANT: For supported versions of Web server-servlet engines, visit http://support.esri.com, select software > ArcIMS > System Requirements
After you have installed your Web server and Servlet Engine you must verify that they are communicating with each other. To verify that your Web server and Servlet Engine are communicating see Verifying your Servlet Engine. If your Web server and Servlet Engine do not appear to be successfully communicating with each other, see your Servlet Engine's Web site for further information.
Automated Web server - Servlet Engine configuration is provided for the following:
Apache 2.0.5x with Tomcat 5.5.x
Apache 2.2.x with Tomcat 6.0.x
IIS with ServletExec 5.0/6.0
IIS with Tomcat 5.5.x/6.0.x
You can run the post installation setup at any time from Start > Programs > ArcGIS > ArcIMS > ArcIMS Post Installation.
Select the Web server you installed

Select the Web server-servlet engine combination you have installed on your machine.
Select I will manually configure my Web server - servlet engine, if you are using a Web server that is not currently configured automatically. If you select Other, you will need to manually configure your Web server. See Step 4: Configure your Web server for details.
Provide information about your Web server-servlet engine combination
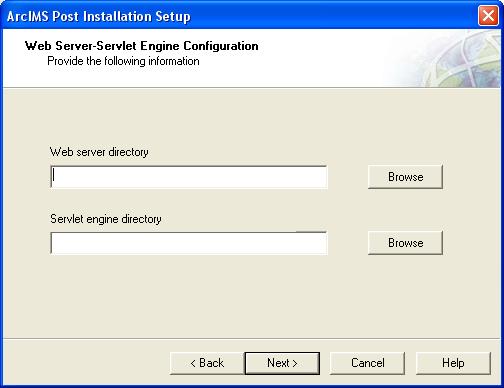
Depending on your chosen Web server-servlet engine combination, various information in this dialog box will be required.
Use the Help button on this dialog box to view a list of common Web servers and their servlet directories. If you are unsure of the location of your Web server or servlet engine directory, contact your system administrator.
Notes for IIS 6.0 users:
If using IIS 6.0 as your Web server, in order for the Java (both Custom and Standard) viewers to work:
Go to the Control Panel > Administrative Tools > Internet Information Services (IIS) Manager.
Select "your_computer_name (local computer)" from underneath Internet Information Services on the left-hand side and right-click on it.
Select Properties from the list menu which is displayed.
Click on MIME Types.
Select New.
For Extension, enter: .axl
For MIME type, enter: text/xml
OK your changes and exit the IIS Manager.
Notes for IIS 7.0 users:
If using IIS 7.0 as your Web server, in order for the Java (both Custom and Standard) viewers to work:
Go to the Control Panel (switch to Classic View) > Administrative Tools > Internet Information Services (IIS) Manager.
Select Default Web Site
Select MIME Types, then right-click and select Open Feature.
Click Add from the Actions panel to open the Add MIME Type dialog.
Enter "axl" in the File name extension field.
Enter "text/axl" in the MIME Type field.
Notes for Apache users:
For Apache, you must provide the location of your Web server installation directory. Click Help on this dialog box for common Web Server installation locations.
For manual Web server Servlet Engine configuration see Step 4: Configure your Web server for the following:
Apache with Tomcat
IIS with Tomcat
IIS with ServletExec 5.0/6.0
Oracle Application Server 10g R3 (10.1.3.3)
Sun Java System (Sun ONE) Application Server 9.0
WebLogic 9.2
WebSphere 6.1 with IBM HTTP Server 6.0