| Visual Basic (Declaration) | |
|---|---|
Public Property Url As Uri | |
| C# | |
|---|---|
public Uri Url {get; set;} | |
Accessing a KmlLayer is unique in that ArcGIS Server is not required to view geographic information. Since the KmlLayer is based upon a KML or KMZ file, all that is required is a web server to host the KML/KMZ file. NOTE: ArcGIS Server has the ability to host geographic web services created in ArcMap as native KML/KMZ files.
Developers who wish to test the KmlLayer functionality using KML/KMZ files locally on their development machine have several options depending on the API platform that they are developing on.
In Silverlight:
Option #1: Developers can place the KML/KMZ file in the ClientBin directory of the test web site that is generated when creating a Silverlight application using Visual Studios built in web server (i.e. the directory that has the path: ..\[APPLICATION_NAME].Web\ClientBin). This option is the easiest method for testing KML/KMZ files when there is no web browser security issues because all of the KML/KMZ functionality is self contained. See the code example in this document for one common workflow example for Option #1.
NOTE: If the KML/KMZ file has hyperlinks (i.e. they begin with http://) to resources (such as other KML/KMZ files) to locations outside of your local network, IT WILL BE REQUIRED to use Option #2 for local testing of KML/KMZ files. Some common KML tags (or nested sub-tags) that can use external hyperlinks outside of your local network include the following: <href>, <Style>, <Icon>, <IconStyle>, <StyleMap>, <NetworkLink>, and <styleUrl>. Additionally, if you get a Security Exception or unhandled exception 4004 errors in Visual Studio during your Silverlight application debugging, you will most likely need to use Option #2 instead.
Option #2: If the developer has installed a web server on the same computer as Visual Studio (for example: Internet Information Server (IIS)), then they can place the KML/KMZ file in an application directory of their local web server (i.e. http://localhost). Using this option has the additional requirements of:
- Setting up the correct MIME type on the web server to handle KML/KMZ files
- Adding a crossdomain.xml file to the root of the web server
- Making use of a proxy to avoid Security Exception error messages
See the code example in the KmlLayer.ProxyUrl Property for one common workflow example of Option #2.
In WPF:
Option #1: Because WPF does not have the same security restrictions as Silverlight, developers can place a KML/KMZ file anywhere on the local hard drive and provide the file path as the KmlLayer.Url (example: Url="C:\TEST_KML_FILES\Test.kml").
Option #2: If developers want to use a local web server (like IIS) to place their KML/KMZ files for testing, they are free to do so just like in Silverlight (example: Url="http://localhost/TEST_KML_FILES/Test.kml"). NOTE: WPF does not use proxies so the use of KmlLayer.ProxyUrl is not necessary (even though the local KML file may have resource links (i.e. http://) to locations outside of the local network).
In Windows Phone:
Option #1: If developers want to use a local web server (like IIS) to place their KML/KMZ files for testing, they are free to do so just like in Silverlight (example: Url="http://localhost/TEST_KML_FILES/Test.kml"). NOTE: Windows Phone does not use proxies so the use of KmlLayer.ProxyUrl is not necessary (even though the local KML file may have resource links (i.e. http://) to locations outside of the local network).
The following steps show one example of how a developer could test a simple KML file (with no external hyperlink dependencies) using Visual Studio’s built-in web server (Cassini):
- Launch Visual Studio 2010
- Choose File | New Project from the Visual Studio menus.
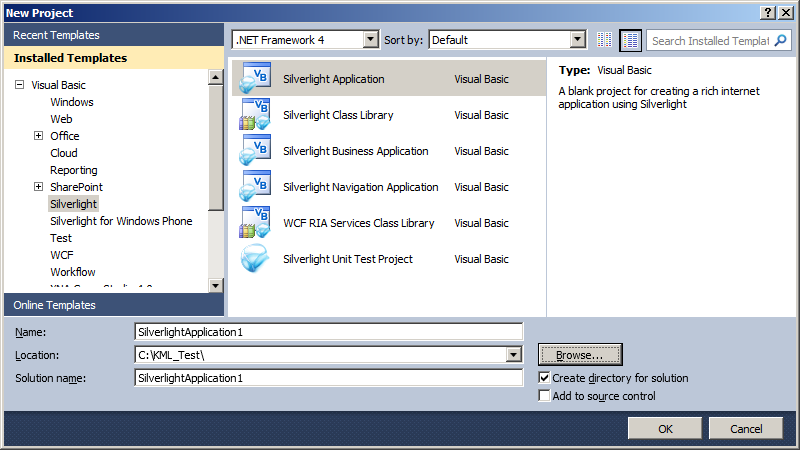
- In the New Project dialog, expand .NET Language of your choice (Visual Basic shown in this example), click on the Silverlight Template, choose Silverlight Application, and specify the following information in the textboxes:
- Name: SilverlightApplication1
- Location: C:\KML_Test\
- Solution name: SilverlightApplication1

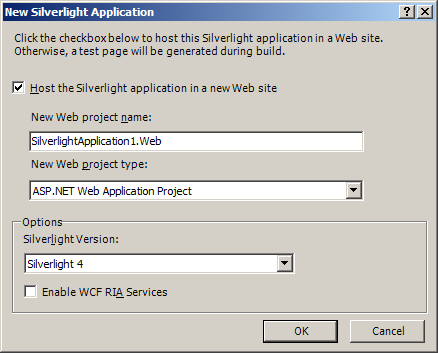
- In the New Silverlight Application dialog, accept the defaults (make sure the Host the Silverlight application in a new Web site is checked). This will use the Visual Studio built-in web server (Cassini) for launching your Silverlight application (see the following screen shot):

- Drag an ESRI Silverlight API Map Control onto the MainPage.xaml design surface.
- Add the following additional Reference to the Visual Studio Project: ESRI.ArcGIS.Client.Toolkit.DataSources.
- Replace the XAML code in the MainPage.xaml with the following:
<UserControl x:Class="SilverlightApplication1.MainPage" xmlns="http://schemas.microsoft.com/winfx/2006/xaml/presentation" xmlns:x="http://schemas.microsoft.com/winfx/2006/xaml" xmlns:d="http://schemas.microsoft.com/expression/blend/2008" xmlns:mc="http://schemas.openxmlformats.org/markup-compatibility/2006" mc:Ignorable="d" d:DesignHeight="300" d:DesignWidth="400" xmlns:esri="http://schemas.esri.com/arcgis/client/2009"> <Grid x:Name="LayoutRoot" Background="White"> <esri:Map Background="White" HorizontalAlignment="Left" Name="Map1" VerticalAlignment="Top" WrapAround="True" Height="276" Width="376" Margin="12,12,0,0"> <esri:Map.Layers> <esri:LayerCollection> <esri:ArcGISTiledMapServiceLayer Url="http://services.arcgisonline.com/ArcGIS/rest/services/World_Street_Map/MapServer" /> <esri:KmlLayer Url="Test.kml"/> </esri:LayerCollection> </esri:Map.Layers> </esri:Map> </Grid> </UserControl> - Choose Build | Build Solution from the Visual Studio menus (you should not have any compiler Errors/Warnings).
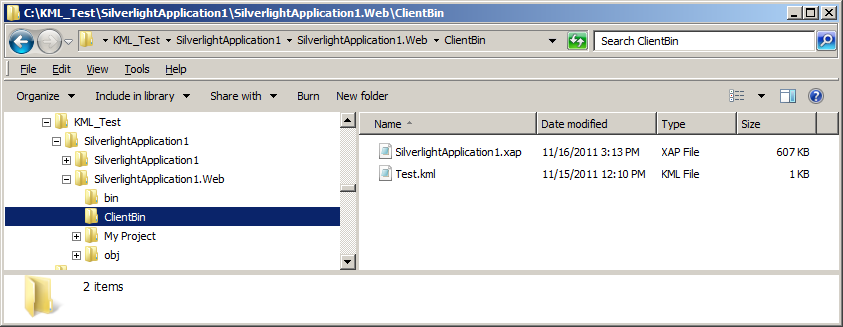
- Using the text editor application, Notepad, copy the following KML syntax and save the file as C:\KML_Test\SilverlightApplication1\SilverlightApplication1.Web\ClientBin\Test.kml (this is the same location as where the SilverlightApplication1.xap file gets created when the Visual Studio Project gets built).
<?xml version="1.0" encoding="UTF-8"?> <kml xmlns="http://www.opengis.net/kml/2.2"> <Document> <name>Simple Placemark KML</name> <visibility>1</visibility> <open>1</open> <Placemark> <name>Simple placemark</name> <visibility>true</visibility> <open>0</open> <Point> <coordinates>-122.0822035425683,37.42228990140251,0</coordinates> </Point> </Placemark> </Document> </kml> - Use Windows Explorer to confirm you have a the C:\KML_TEST\SilverlightApplication1\SilverlightApplication1.Web\ClientBin\Test.kml file created (see the following screen shot):

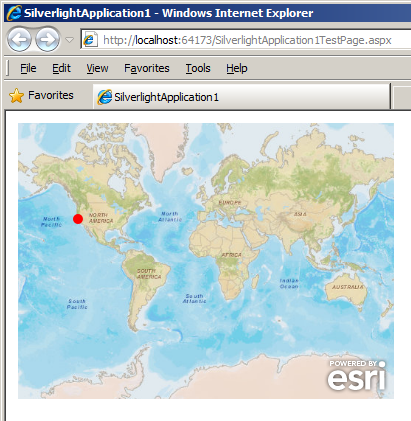
- Hit F5 (or click the Start Debugging button) in Visual Studio to launch the Silverlight application in Internet Explorer. You should get an image that appears like the following screenshot (a single red point in San Francisco):

Target Platforms:Windows Phone 7


